ROS Final Project
Motivation
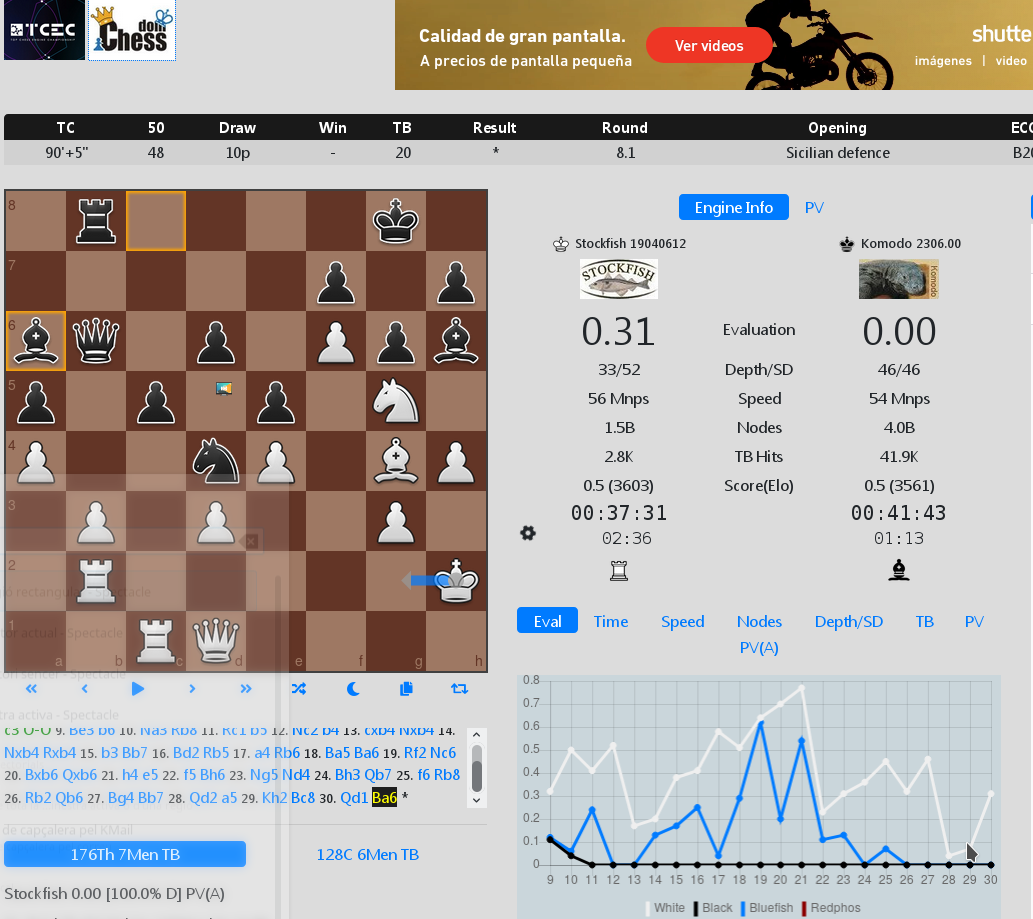
There are several computer engines to play chess that perform really well, like Stockfish and Komodo , and there are several competitions, like the 20th Top Chess Engine Championship that took place on December’20-February’21.
This is ok, but who in the hell is going to move the pieces?? Roboticists come to the rescue!!
Description
The aim of this final project is to put in practice all the ROS tools that have been seen so far, in order to make the ur3 robots move the chess pieces:
A chess match will take place between a human and a robot. The robot will be responsible of moving the pieces according to the chess motions given by a user (or optionally by a chess engine).

In order to implement the system that shall control the robot motions, the following hardware and software components are provided:
Chessboard and chess pieces labeled with aruco markers
The realsense camera that provides 2D and 3D images.
The hardware drivers for the robots, the tools and the camera.
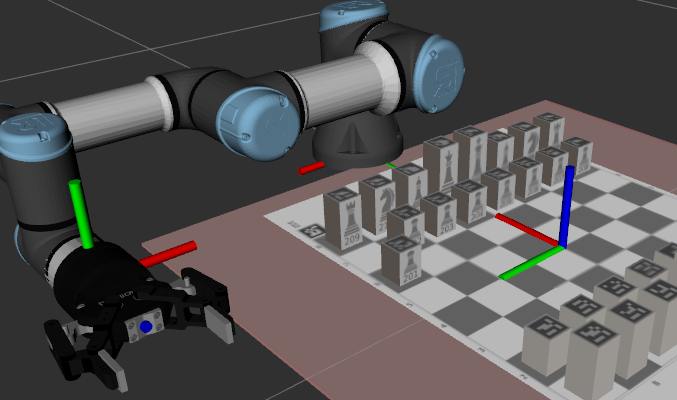
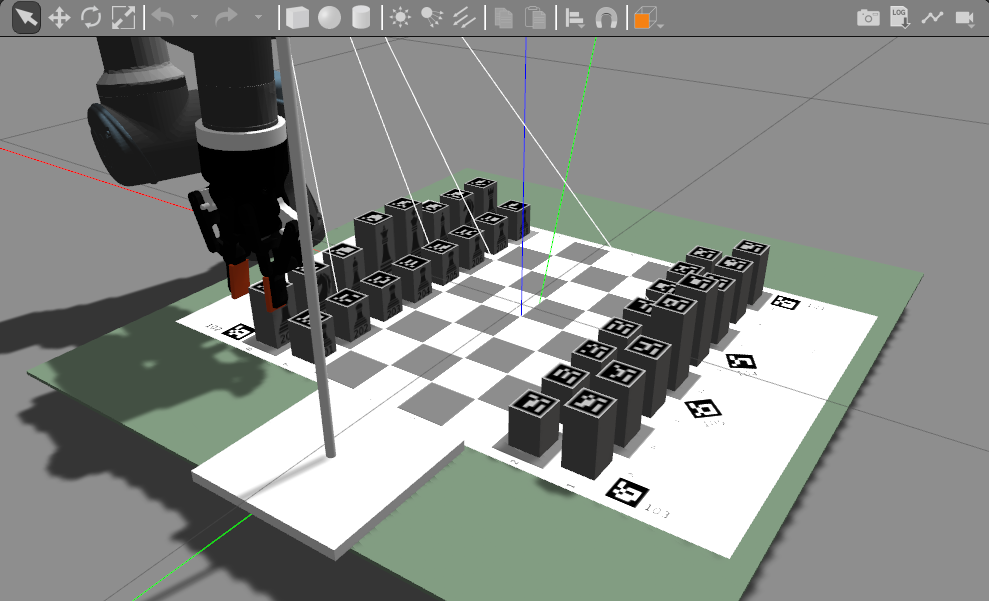
The scene setup in rviz and gazebo.
The aruco library.
Task planning tool: the Fast Downward planning system that uses the fast-forward task planning algorithm to plan the sequence of actions of a task.
Collision-check and motion planning tool: The Kautham project tool, with a ROS interface, that allows to test for collisions and to ask for collision-free paths.
Setup
Chessboard
The cells of the chessboard have sides of 5 cm; and are labeled as usual with numbers (the rows) and letters (the columns):

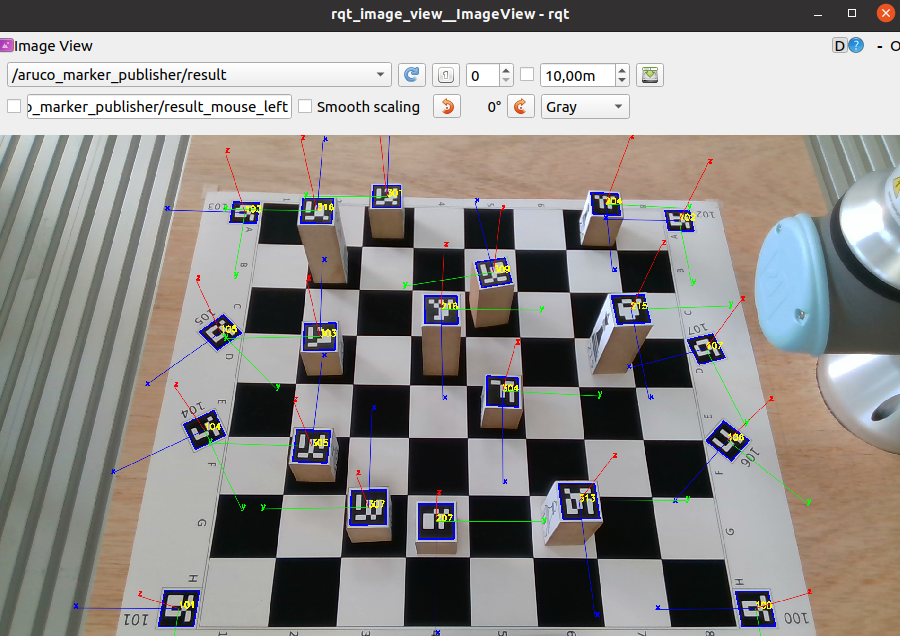
There are 8 aruco markers on the chessboard, with labels 100 to 107, that will be used to calibrate the camera pose. Their size is 26 x 26 mm.
The world reference frame is located at the center of the chessboard.
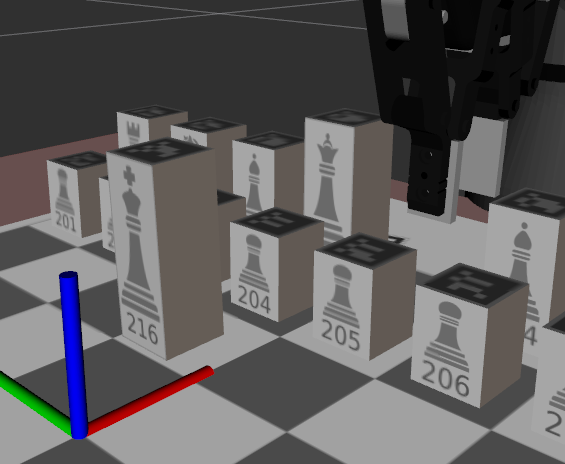
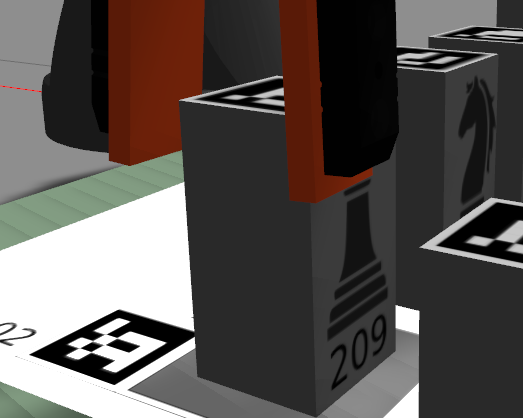
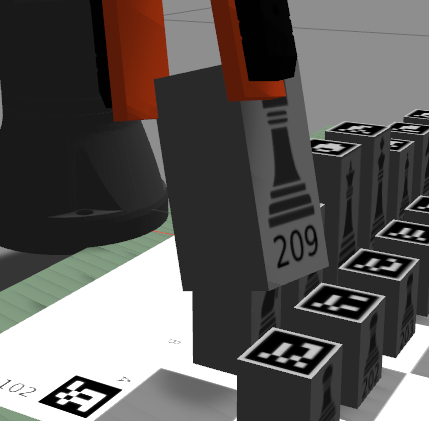
Pieces
The pieces have aruco markers with the following numbering:
Black pawns: From 201 to 208.
Black rooks: 209, 210.
Black knights: 211, 212.
Black bishops: 213, 214.
Black queen: 215.
Black king: 216.
White pawns: From 301 to 308.
White rooks: 309, 310.
White knights: 311, 312.
White bishops: 313, 314.
White queen: 315.
White king: 316.
The base of the pieces is 3 x 3 cm and the size of the aruco markers is 2.78 x 2.78 cm.
The height of the pieces is:
Pawns: 4 cm.
Rooks, knights and bishops: 6 cm.
King and queen: 8 cm.
The robot
The robot is named team_A and is located w.r.t. the world frame at (0.37, 0.0, -0.004, 0.0, 0.0, 1.5708), being the transformations expressed as (x,y,z,r,p,y).
The exact actual location should be obtained using a calibration procedure that will be provided.
team_A robot will play black.
Provided packages
The following packages grouped in the meta-repository ros2223-final-project meta-repository are provided:
UR3-IK: ROS server that ofers the Inverse Kinematics of the UR3 robot as a service.
kinenik: Library to compute the Inverse Kinematics of any robot from Universal Robots (UR3, UR5, UR10, UR3e, UR5e, UR10e).
Universal_Robots_ROS_Driver: Driver enabling ROS operation of UR robots.
fmaunch_universal_robot: ROS support for the universal robots.
aruco_ros: Software package and ROS wrappers of the Aruco Augmented Reality marker detector library.
aruco_broadcaster: Project to easily configure and publish the tf of the aruco frames detected.
downward_ros: ROS wrapper to the Fast Downward planning system.
gazebo_ros_link_attacher: Utility to attach/detach models in Gazebo.
robotiq: ROS-Industrial robotiq meta-package.
robitcsgroups_gazebo_plugin: Gazebo plugin needed for the simulation of the gripper.
tablesens: Package for the calibration of the camera.
test_hardware: Package to test the devices.
And the following package to be imported:
chesslab_setup: Project scene setup and server for basic planning services.
To work with them follow these instructions:
In your git-projects folder clone the projects from the ros2223-final-project meta repository:
$ git clone --recurse-submodules https://gitioc.upc.edu/rostutorials/ros2223-final-project.git
Follow the procedure shown in Procedure to prepare the exercises to import in the intro2ros/2023/teamXX/FINAL-WORK subgroup of your GitLab account the package:
chesslab_setup: https://gitioc.upc.edu/rostutorials/chesslab_setup.git
In your git-projects folder clone the chesslab_setup project of your GitLab account inside an final-work subfolder (change XX by your team number). You can use https:
$ git clone https://gitlab.com/intro2ros/2023/teamXX/final-work/chesslab_setup.git final-work/chesslab_setupor ssh:
$ git clone git@gitlab.com:intro2ros/2023/teamXX/final-work/chesslab_setup.git final-work/chesslab_setup
In your catkin_wsFinalProject/src folder make logical links to the folders projects.
$ ln -s ~/git-projects/ros2223-final-project/
$ ln -s ~/git-projects/final-work/chesslab_setup/
Install in your computer all the dependencies required:
$ sudo apt-get upgrade
$ sudo apt-get update
$ sudo apt-get -y install apt-utils apt-transport-https libsasl2-dev software-properties-common
# universal_robot driver dependencies $ sudo apt install ros-noetic-industrial-robot-status-interface ros-noetic-moveit# realsense dependencies $ sudo apt install ros-noetic-realsense2-camera ros-noetic-realsense2-description# gripper dependencies $ sudo apt-get install -y libmodbus-devInstall the Fast Downward planning system:
$ sudo add-apt-repository ppa:deb-rob/focal-robotics
$ sudo apt update
$ sudo apt install fast-downward
Also, the installation of The Kautham Project is required, which is a motion planning package that will be used for collision-checking purposes.
$ sudo add-apt-repository ppa:deb-rob/focal-robotics
$ sudo apt-get update
$ sudo apt-get install kautham kautham-tools kautham-ros-osrf kautham-demos-osrf
$ sudo apt-get upgrade
Alternatively, you can download and install The Kautham Project following these instructions.
In your catkin_wsFinalWork/src folder build the packages.
$ catkin build
Testing
The chesslab_setup package contains all what is necessary to set up the scene in rviz, in gazebo and with the real hardware.
All the launch instructions are coded in an xml file called new-dashboard.launch.xml that is called by different launch files with the appropriate parameters in order to evaluate all the utilities offered.
Checking the urdf model of the scene
Launch the display.launch file to visualize the robots and the camera.
$ roslaunch chesslab_setup display.launch
Testing the offered services
Launch the demoservices.launch file to start the services to:
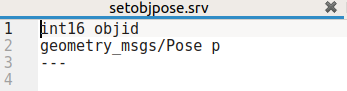
Place the pieces
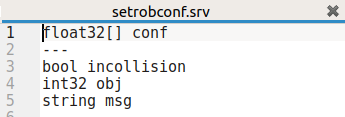
Move the robot and test for collisions
Attach / detach a piece
Compute the inverse kinematics
Compute the sequence of actions for a chess movement
$ roslaunch chesslab_setup demo_services.launch
The following clients are implemented to test the services. If called with the argument initialize the initial setup is recovered before actually calling the service.
Placing pieces
Run the client node demo_movepiece that moves a black pawn.
$ rosrun chesslab_setup demo_movepiece
Moving the robot and checking for collisions
Run the client node demo_collision that moves robot teamA to a configuration where the gripper collides with the black king.
$ rosrun chesslab_setup demo_collision

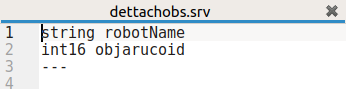
Attaching/detaching a piece
Run the client node demo_attach that moves robot teamA to a configuration to grasp the black king, grasps it and then moves to a collision-free configuration.
$ rosrun chesslab_setup demo_attach

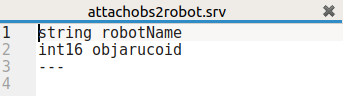
Run the client node demo_detach that moves robot teamA to a configuration to grasp the black king, grasps it and then moves to a placement cell where it is detached.
$ rosrun chesslab_setup demo_detach initialize
Using the inverse kinematics
Run the client node demo_ik to test the inverse kinematic service. The pose given as a request is set w.r.t. the robot base (frame base_link).
$ rosrun chesslab_setup demo_ik

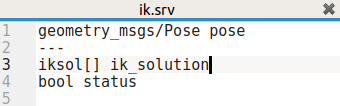
Alternatively, the IK can be computed using the kinenik library. Follow the instructions in the git repository README on how to use it.
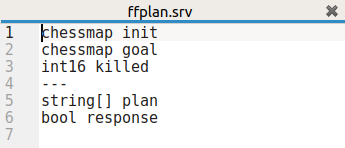
Planning a sequence of actions to execute a chess movement
Run the client node demo_ik to test the task planning service that computes the secuence of motions to execute a chess movement. The request sets the initial and goal states and (optionally) the killed piece.
$ rosrun chesslab_setup demo_planmotions

Check the setup in gazebo
The package.xml file of the chesslab_setup package contains the following lines to set the GAZEBO_MODEL_PATH:
<export>
    <gazebo_ros gazebo_model_path="${prefix}/models"/>
    <gazebo_ros gazebo_media_path="${prefix}/worlds"/>
</export>
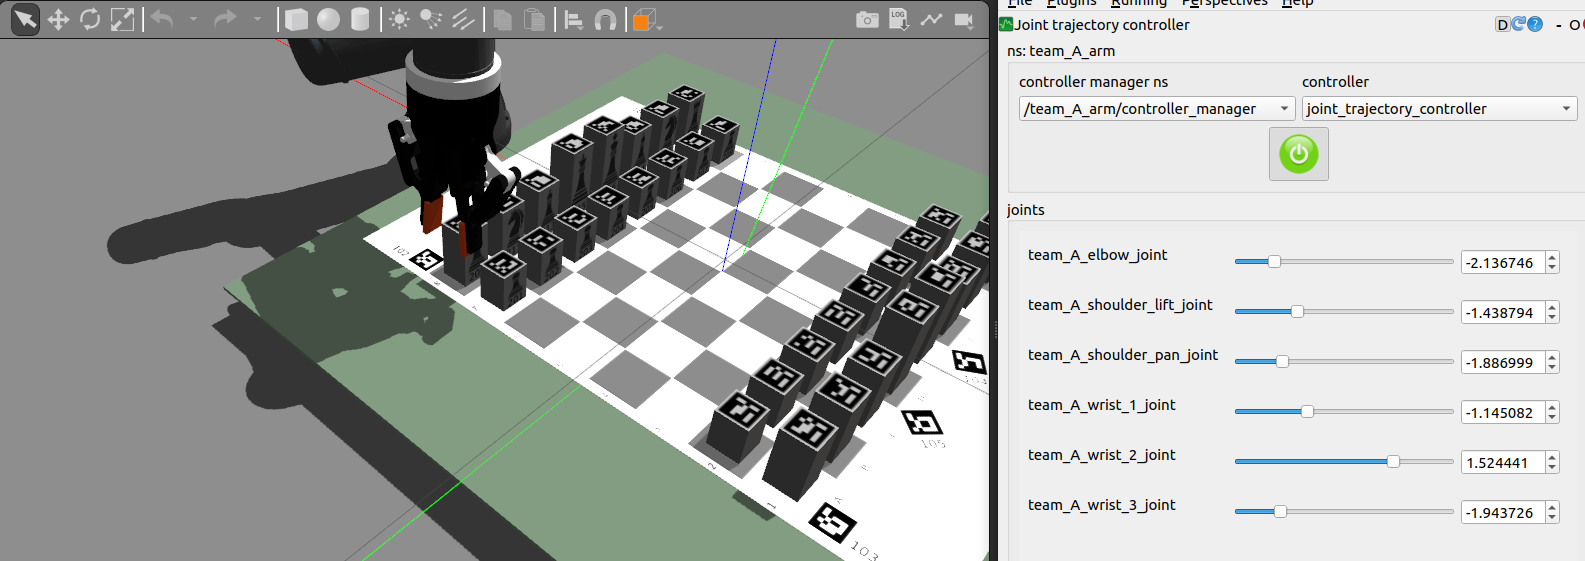
Check the robot controllers
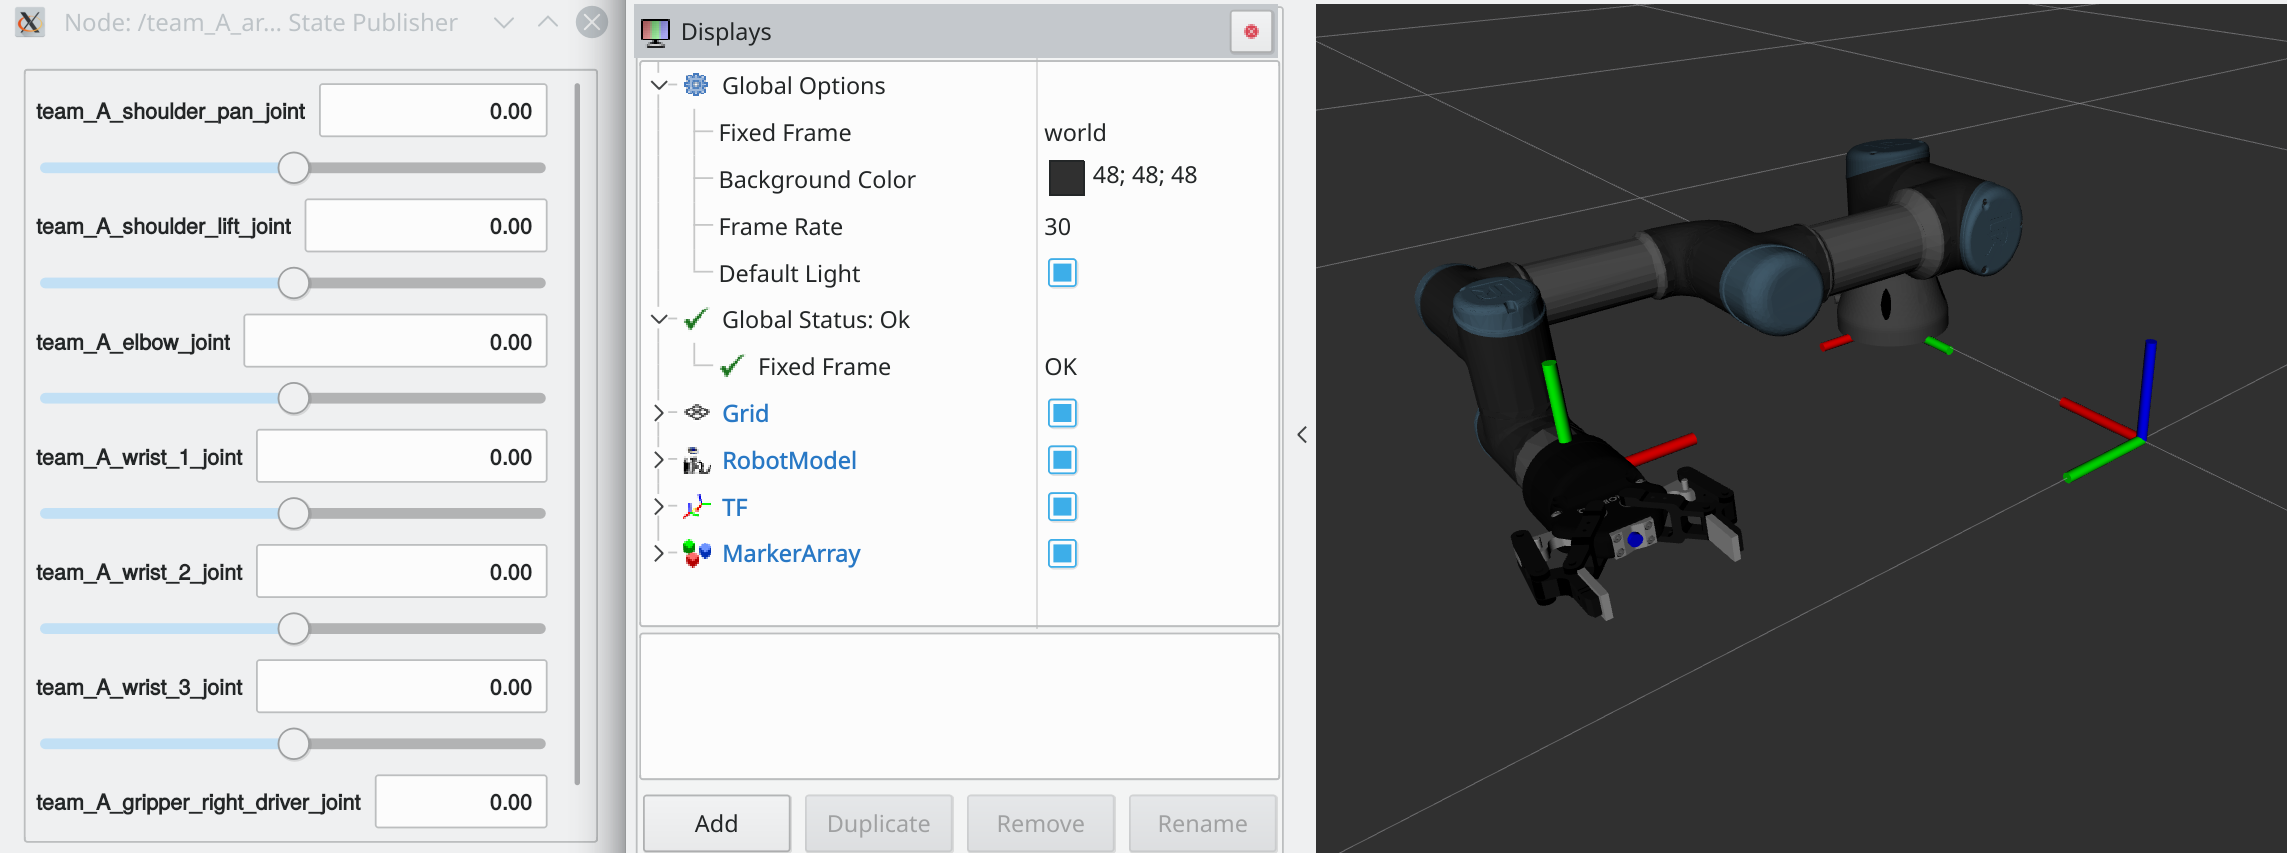
The launch file simulated_scenario_no_camera.launch opens Gazebo, where the two robots are spawned, and also opens two instances of rqt_gui prepared with a perspective that includes the Controller manager plugin and the Joint trajectory controller plugin.
Important
Gazebo is run in paused mode because robots are spawned with some given joint values that can be configured as arguments. Therefore, once opened you should press the play button to start the simulation. Afterwards you can load the corresponding controller in the Joint trajectory controller plugin and press the red on/off button that will turn green and will activate the sliders.
Move the sliders of team A robot to move it.
$ roslaunch chesslab_setup simulated_scenario_no_camera.launch
The new-dashboard.launch.xml file has an argument called controller_with_gripper, which is defaulted to false, that:
When set to
truespawns the controller joint_trajectory_controller_with_gripper that allows the joint trajectory controller to control the six joints of the robot plus the gripper joint. Therefore we will be able to control the gripper using the rqt_gui.When set to
falsespawns the controllers joint_trajectory_controller and gripper_controller that control separately the arm and the gripper, as it is done with the real hardware.
Set it to true in the new-dashboard.launch.xml file and launch again the simulated_scenario_no_cameras.launch file.
Check the attach/detach utility
The team B robot is initialized at a configuration where it is ready to grasp a white rook.
It is difficult to tune the Gazebo contact interaction parameters for correctly simulating a successful grasp. To avoid this, the package gazebo_ros_link_attacher implements a world plugin (loaded in the chesslab_setup.world file) that offers two services:
/link_attacher_node/attach: Creates a fixed joint between two links of two models (arguments are: model_name_1, link_name_1, model_name_2, link_name_2)./link_attacher_node/detach: Destroys the joint between two links of two models (arguments are: model_name_1, link_name_1, model_name_2, link_name_2).
We can attach the white rook to the gripper as follows:
$ rosservice call /link_attacher_node/attach '{model_name_1: 'rookB1', link_name_1: 'link', model_name_2: 'team_A_arm', link_name_2: 'team_A_gripper_left_follower'}'
Move the robot to verify that the piece is attached, then detach it.
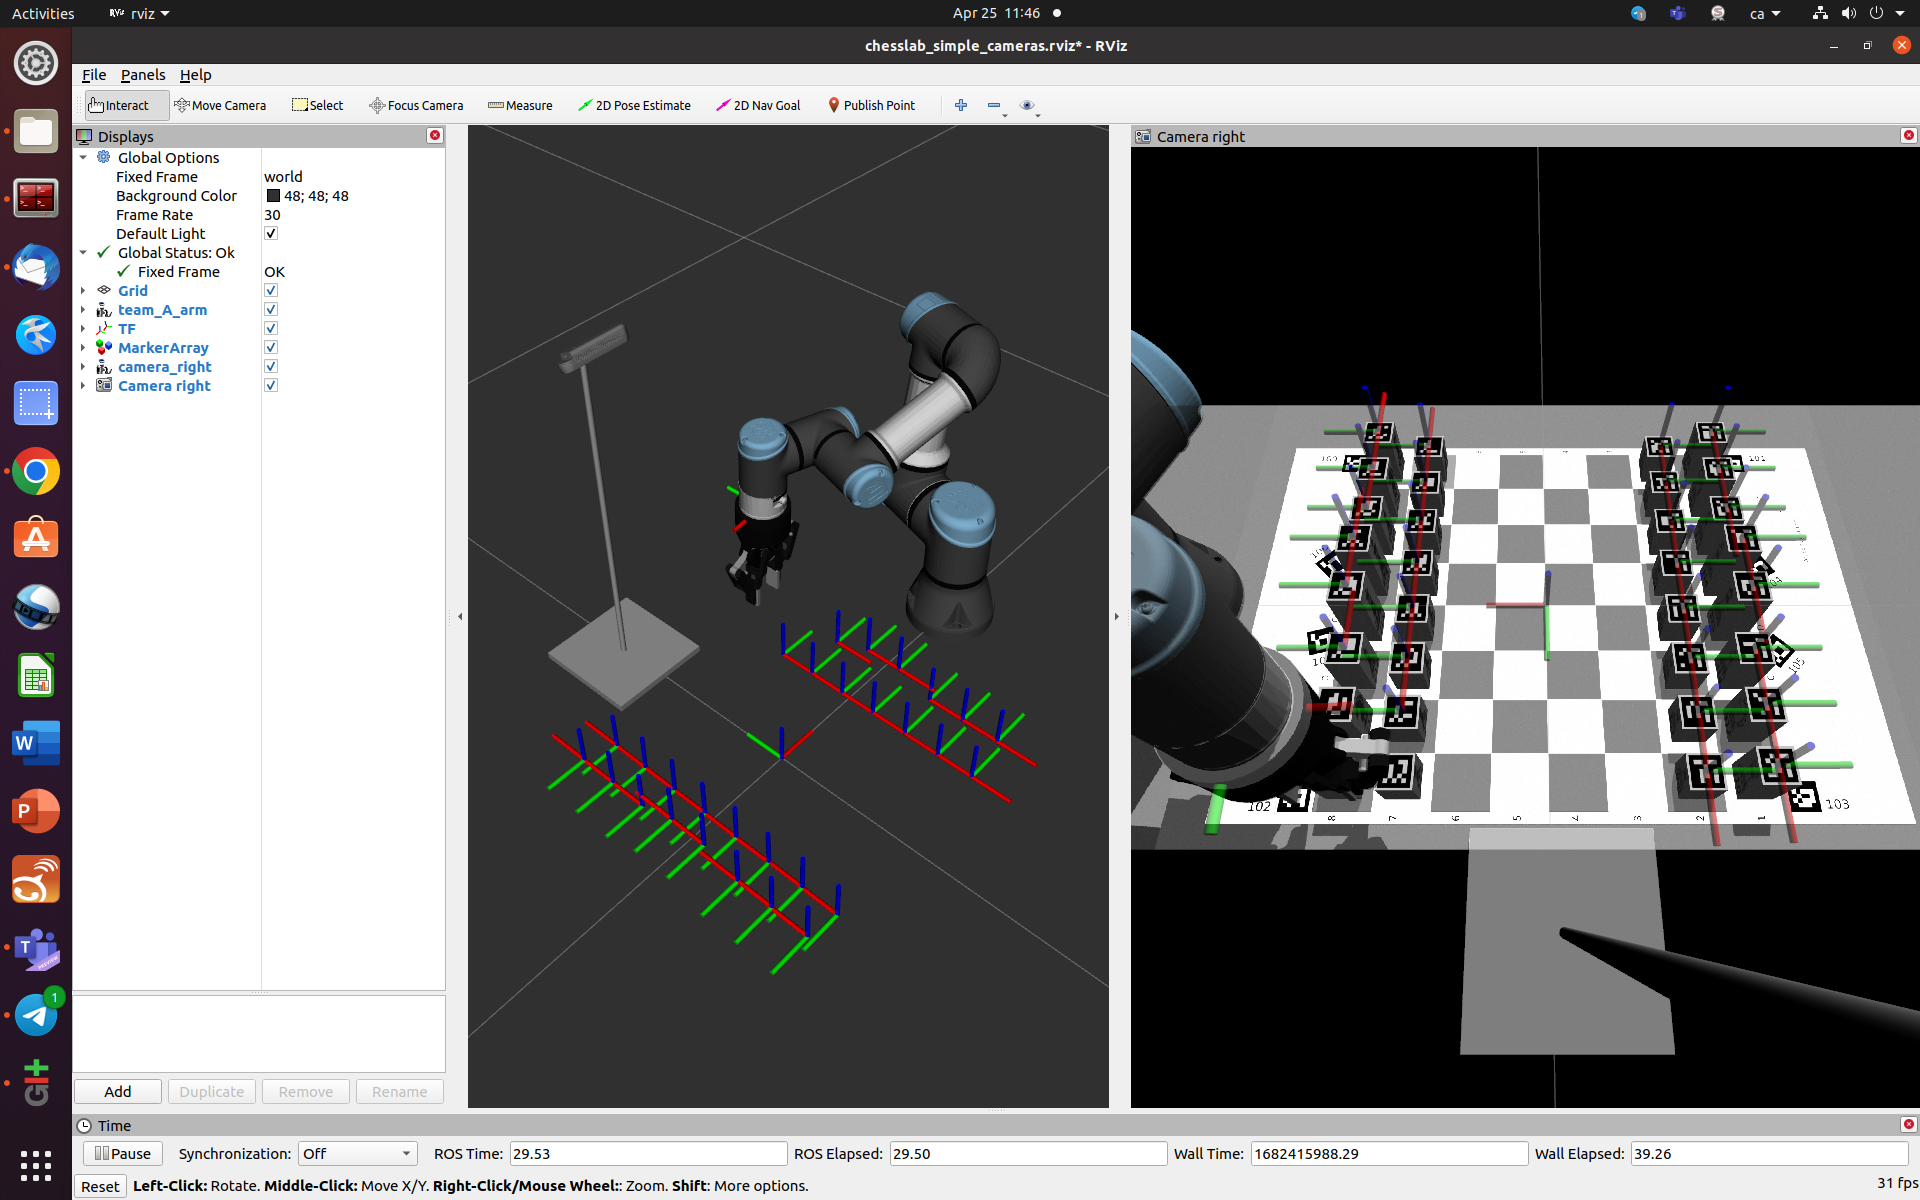
Check the cameras
The launch file simulated_scenario.launch starts the setup in Gazebo with the robots and the cameras and also opens rviz where the images and the robots are shown (but not the chessboard). The aruco_broadcaster node is also started and so the tf of the pieces of the aruco markers detected are also broadcasted and shown.
Important
Gazebo is run in paused mode because robots are spawned with some given joint values that can be configured as arguments. Therefore, once opened you should press the play button to start the simulation.
$ roslaunch chesslab_setup simulated_scenario.launch
Calibration of the camera pose in the lab
Turn on the camera and the aruco marker publisher and visualize with rqt:
$ roslaunch tablesens aruco_realsense.launch
Calibrate the camera (the rs_camera_link frame is obtained):
$ roslaunch tablesens tablecalibrator.launch
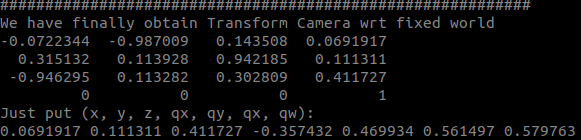
Update the camera pose in the aruco_pl2.launch file of the aruco_broadcaster package with the new calibrated value.
Run the aruco_broadcaster node that publishes the tf of the markers detected, among those specified in the configuration file.
$ roslaunch aruco_broadcaster aruco_pl2.launch

Finally, copy the calibrated pose of the camera into the file robot/camera_right.urdf.xacro of the chesslab_setup package so as to correctly simulate the real scene.
Testing the robot and the gripper
First, try in simulation to move the robot and the gripper using actions with the test_hardware package:
$ roslaunch test_hardware test_simulated_scenario.launch
An action client for the robot is run in a separated X-terminal, from where you can send a predefined motion for the robot.
An action client for the gripper is run in a separated X-terminal, from where you can send a open/close commands to the gripper.
The rqt interface is also opened with the plugin that allow you to load the controllers and move the robot with the sliders.
Important
Gazebo starts in paused mode so you need to first press the play button. Then load the controllers using the rqt and test the motion using the sliders. Finally, you need to close the rqt so that the root action client can get control and test the motions.
To test in the real hardware, follow these steps. A default robot configuration file called my_robot_calibration.yaml is stored in the config folder of the chesslab_setup package. You should generate the particular robot configuration file of the particular robot in your working station and replace the default one. To generate the configuration file use the following instruction tuned with your robot IP:
WS-1 robot IP: 10.5.20.80WS-2 robot IP: 10.5.20.81WS-3 robot IP: 10.5.20.79WS-4 robot IP: 10.5.20.82WS-5 robot IP: 10.5.20.83WS-6 robot IP: 10.5.20.84$ roslaunch ur_calibration calibration_correction.launch robot_ip:=<robot_ip> target_filename:="${HOME}/my_robot_calibration.yaml"
Now edit the test_real_scenario.launch file to update the my_robot_ip argument with that of your robot and set the e-series to True or False according to the type of robot:
WS-1 robot type: CBSWS-2 robot type: CBSWS-3 robot type: e-seriesWS-4 robot type: e-seriesWS-5 robot type: e-seriesWS-6 robot type: e-series
Now you are ready to test the real hardware as you did in simulation. As before, the robot and gripper clients are opened in separated X-terminals, from where you can send a predefined motion for the robot and open/close the gripper. In the real scenario, however, the gripper is not controlled through actions but using a gripper_server that offers different services to control the gripper, which publish to a topic with the corresponding control code. The services offered are reset, reactivate, open, close and move.
$ roslaunch test_hardware test_real_scenario.launch
Development
The teams can use the offered packages (not mandatory), and others, if required.
The ROS system to be implemented should respond to the human queries (or from a chess engine) to make a chess action (a movement to a free cell, a movement to kill a piece or to castle movement).
The development of the project can be split in the following three modules.
Sensing module
It should be the responsible of sensing the state of the environment. It should provide services to:
Setup: Detect the poses of the chess pieces (in the real or simulated scenario) and set them in rviz.
Give the location of a given chess piece.
Optionally, check the correct result of a pick-and-place motion.
Optionally, check the correctness of a chess action query.
Planning module
It should be responsible of planning the sequence of motions to execute a chess action. The following services and function could be provided to:
Compute the robot pose to pick/place a piece in any given cell.
Plan a collision-free rectilinear motion.
Plan the motions for a pick action.
Plan the motions for a place action.
Parse the output of the task planner into the corresponding action.
Action manager module
It should be the responsible of launching the execution in the Gazebo simulation and in the real environment. It should provide functions and services to:
Open/close the gripper.
Execute a robot motion.
Receive the chess action query to be executed.
Manage the whole process.
Package organization
The project must be able to run by using:
The packages in the meta-repository ros2223-final-project.
The packages in your final-work subfolder of your Gitlab account (https://gitlab.com/intro2ros/2023/teamXX/final-work, being XX your team number).
Evaluation
Deliverables
A first deliverable will consist on:
a report explaining the schema of the solution,
(optionally) the git repo skeleton for the implementation.
The final deliverable will consist on:
a short report explaining the main features of the implemented solution,
the git repo with all the code,
video with the performance in simulation.
Tests
The following tests will be used to evaluate the performance of the implemented system:
Given a state of a chess match in Gazebo, locate a given piece (returning the cell code where it is placed).
Plan the motion of the robot (without holding any piece) from the home configuration to a pre-grasp configuration on a given cell (specified by the chess coding, e.g. B4). Visualize the path in rviz.
Plan the motion of the robot (holding a given piece) from the home configuration to a pre-place configuration on a given cell.
From a given pre-grasp configuration (with the gripper closed without holding any piece) plan a pick motion of a particular piece.
From a given pre-place configuration (with the gripper closed holding a particular piece) plan a place motion to place the piece on the cell.
Plan the motions to move a piece.
Plan the motions to kill a piece.
Plan the motions for a castle operation.
Execute any of the previous plans in Gazebo.
Given a state of a chess match in the real environment, locate a given piece (returning the cell code where it is placed).
Execute any of the previous plans in the real robot.
Evaluated issues
The following points will be taken into consideration for the evaluation:
Performance of the tests.
Structure of the solution.
The correct use of topics, services and actions.
Efficient use of launch files.
Code style and documentation.