TUTORIAL T2d: Sensing
Provided packages:
- This tutorial will use the following packages:
- Package gazebo_sensors_tutorialPackage aruco_ros
Download the file sensing.zip and unzip it into your catkin_ws/src folder. It contains the gazebo_sensors_tutorial package. The aruco_ros was provided with the ris_project.zip file in section EXERCISE 1.
References:
This tutorial is partially based on the ROS wiki and on chapter 6 of A gentle introduction ROS by Jason M. O’Kane.
The rosbag Tool
Recording and replaying bag files
The rosbag tool allows you to record the messages published on one or more topics to a file, and then later replay those messages.
This allows to debug our program using real data, i.e. by using rosbag we can run the real robot only a few times, recording the topics we care about, and then replay the messages on those topics many times, while debugging the code that processes those data.
The rosbag tool is available from the command line, as a package with nodes that can be run using the launch utility, and through the graphical interface rqt.
Recording bag files
To create a bag file from the command line use:
$ rosbag record -O filename.bag topic-names
You can check all the rosbag record options with the -h flag. These are some of the most used ones:
-O NAMErecord to bag with name NAME.bag-o PREFIXprepend PREFIX to beginning of bag name (name will always end with date stamp)-arecord all topics--duration=DURATIONrecord a bag of maximum duration DURATION in seconds--node=NODErecord all topics subscribed to by a specific node
Replaying bag files
To replay a bag file from the command line use:
$ rosbag play -O filename.bag
You can check all the rosbag play options with the -h flag. These are some of the most used ones:
-r FACTORmultiply the publish rate by FACTOR--topicstopics to play back
Inspecting bag files
The rosbag info command can provide a number of interesting snippets of information about a bag, like the duration, message count, and topic lists.
$ rosbag info filename.bag
e.g.:
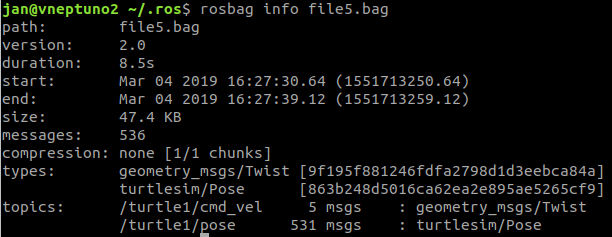
An example
To put in practice this utility, let’s launch the turtle teleoperation example:
$ roslaunch demolaunch teleopturtlesim.launch
and record the messages bradcasted while teleoperating the turtle (press Ctrl+C to stop recording):
$ mkdir ~/bagfiles
$ rosbag record -o ~/bagfiles/teleopturtle /turtle1/cmd_vel /turtle1/pose
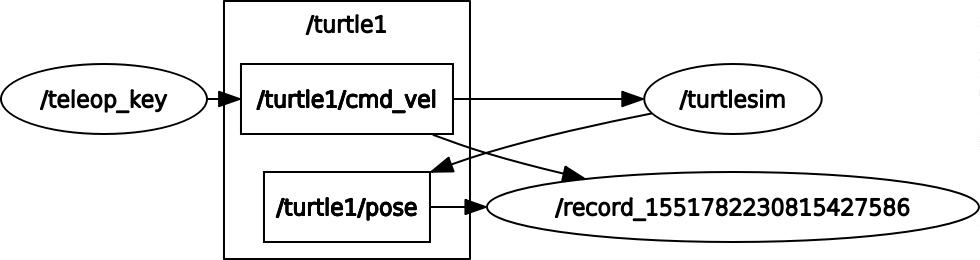
The ROS graph shows a record node subscribed to topics /turtel1/cmd_vel and /turtle1/pose:
>>> EXERCISE
 - Check the recorded file using the rosbag info option.
Now close and restart again the teleopturtlesim.launch and observe the turtle moving while the recorded bagfile is replayed (change the name accordingly):
$ rosbag play ~/bagfiles/teleopturtle_2019-03-05-10-39-28.bag --topics /turtle1/cmd_vel
- Note that:
- rosbag only replicates a sequence of messages, it does not reproduce the initial state, therefore the trajectory of the turtle would have been different from the one followed while recording, hadn’t we restarted the teleopturtlesim.launch.
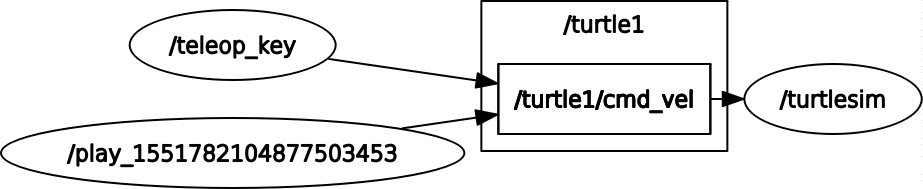
- If we had broadcasted all the messages (i.e. without specifying the
--topicsoption), then both the turtlesim node and the rosbag would be simultaneously publishing to the same topic /turtle1/pose. This could be a problem if some node were subscribed to this topic. The same happens with the turtle1/cmd_vel topic, as shown in the ROS graph where we see the teleopkey node and the play node both publishing commanded velocities:
Bags in launch files
ROS also provides executables named record and play that are members of the rosbag package. They can be called using roslaunch, e.g.:

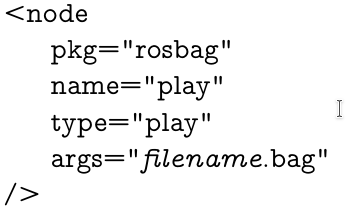
The args could be passed as arguments to the launch file, as done in the following example:
<launch>
  <arg name="filename" />
  <arg name="topicname" default="-a" />
  <node
    pkg="turtlesim"
    type="turtlesim_node"
    name="turtlesim"
    respawn="true"
  />
  <node
      pkg="turtlesim"
      type="turtle_teleop_key"
      name="teleop_key"
      required="true"
      launch-prefix="xterm -e"
  />
  <node
     pkg="rosbag"
     type="record"
     name="record"
     args="-O $(arg filename) $(arg topicname)"
  />
 </launch>
Launch this roslaunch file to record all the topics in a rosbag file called file0.bag:
$ roslaunch demolaunch teleopturtlesim_record.launch filename:=file0.bag
This file will be stored in the ~/.ros folder. If you want to place elsewhere then you need to provide an absolute path.
To record some specific topics, then:
$ roslaunch demolaunch teleopturtlesim_record.launch filename:=file0.bag topicname:="/turtle1/cmd_vel /turtle1/pose"
The following launch file launches the teleoperation application with the rosbag play node:
<launch>
  <arg name="filename" />
  <node
    pkg="turtlesim"
    type="turtlesim_node"
    name="turtlesim"
    respawn="true"
  />
  <node
    pkg="rosbag"
    type="play"
    name="play"
    args="$(arg filename)"
  />
 </launch>
Launch it to replay the file0.bag file recorded previously (stored in the ~/.ros folder):
$ roslaunch demolaunch teleopturtlesim_play.launch filename:=file0.bag
If you want to replay a bag file placed elsewhere then you need to provide an absolute path.
The rqt_bag utility
rqt_bag is a graphical application for recording and replaying bag files. It allows to:
- show bag message contents
- display image messages (optionally as thumbnails on a timeline)
- plot configurable time-series of message values
- publish/record messages on selected topics to/from ROS
- export messages in a time range to a new bag
Let’s use it for recording topics of the turtle teleoperation example:
$ roslaunch demolaunch teleopturtlesim.launch
$ rqt_bag
Press the red button to start recording (first you will be queried to select the topics to be recorded and the name of the bag file). If you select to record the commanded velocity then some plot like the following will be shown (note that until no messages are broadcased by teleoperating the keys, actually nothing is recorded).

Now, let’s use it for replaying the recorded bag. Open again the rqt_bag tool and load the ros bag. Once loaded, select the Publish option (as shown in the figure below) and play:

You will see the turtle moving as the /turtle1/cmd_vel messages are replayed.
Using cameras and fiducial markers
Image rectification
The image_proc package contains the image_proc node, which ite main purpose is to remove camera distortion from the raw image stream, and therefore acts between the camera driver and the vision processing nodes.

Subscribed Topics
- image_raw (sensor_msgs/Image): Raw image stream from the camera driver.
- camera_info (sensor_msgs/CameraInfo): Camera metadata.
Published Topics
- image_mono (sensor_msgs/Image): Monochrome unrectified image.
- image_rect (sensor_msgs/Image): Monochrome rectified image.
- image_color (sensor_msgs/Image): Color unrectified image.
- image_rect_color (sensor_msgs/Image): Color rectified image.
The image_proc node must run in the camera namespace, e.g. for a camera named /my_camera which is publishing the topics /my_camera/image_raw and /my_camera/camera_info it should be run as:
$ ROS_NAMESPACE=my_camera rosrun image_proc image_proc
Or within a launch file as:
<env name="ROS_NAMESPACE" value="my_camera">
<node name="image_proc" pkg=" image_proc" type="image_proc">
Or alternatively as:
<node ns="my_camera" name="image_proc" pkg=" image_proc" type="image_proc">
The ArUco library
As an application example, the estimation of the poses of objects will be tackled using the ArUco library, an open-source library for fast camera pose estimation using squared markers, and the aruco_ros package that wraps it, i.e.:
- the aruco_ros nodes look for a given marker ID and if found publishes a message with its pose.
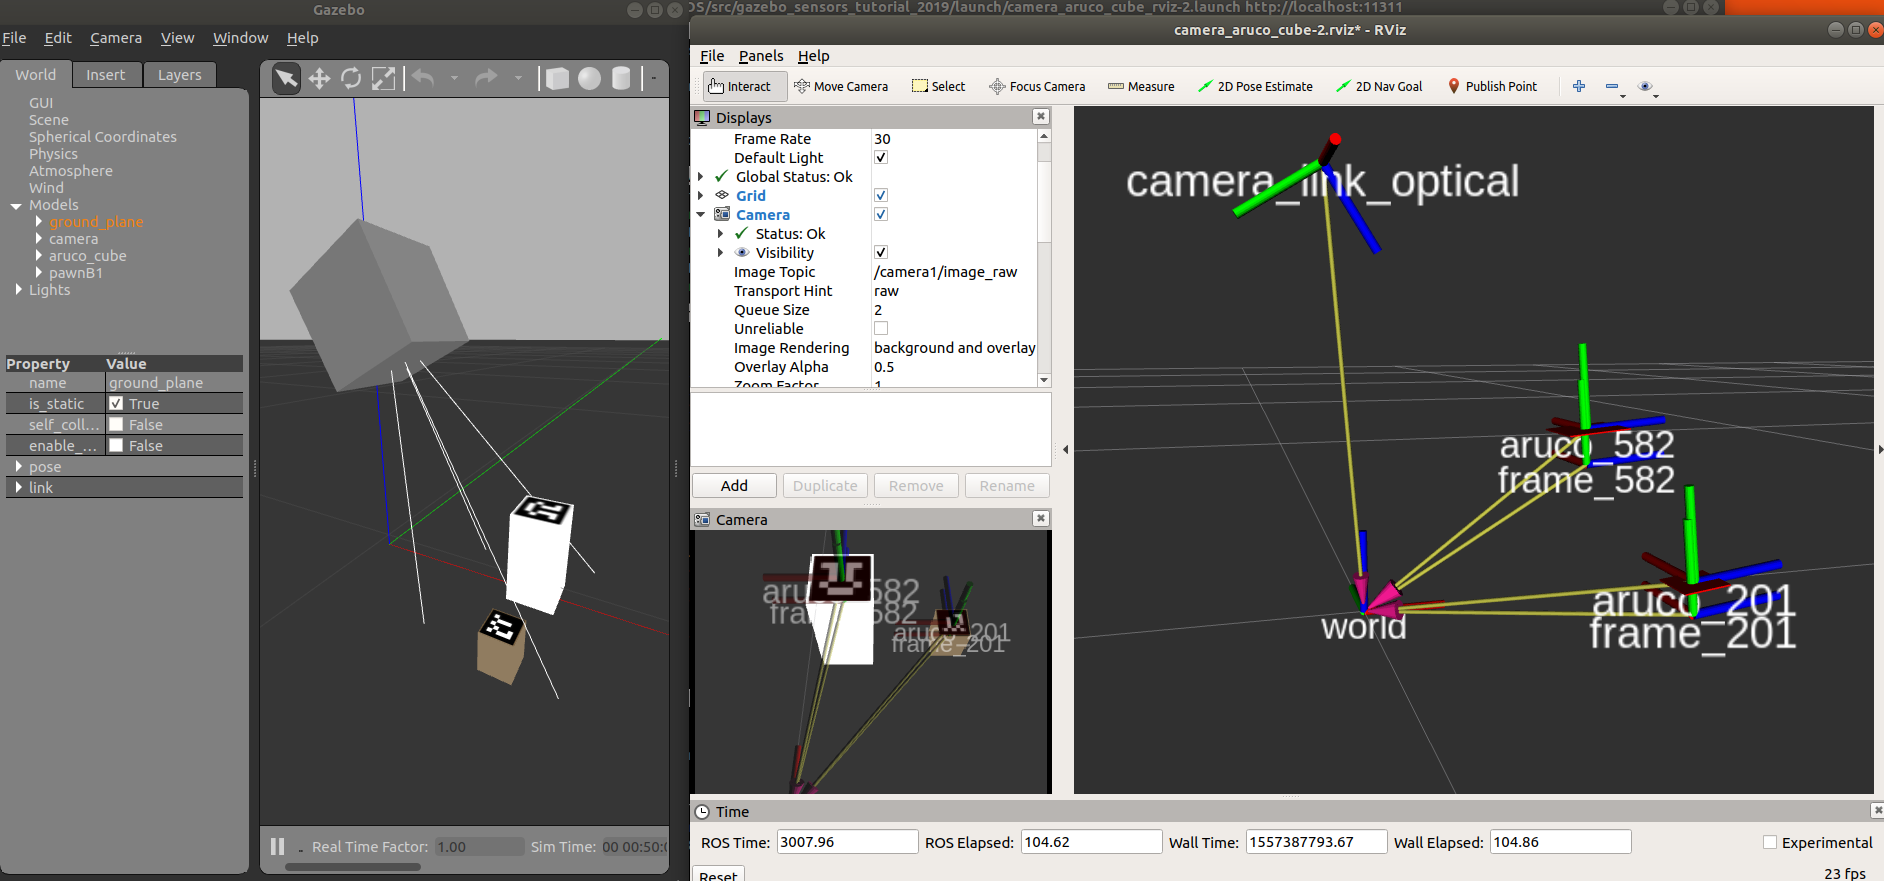
Start by launching gazebo with a world that includes a camera and then spawning two objects with ArUco markers, the aruco_cube model with marker ID 582 and the pawnB1 model with marker ID 201 (recall to update the GAZEBO_MODEL_PATH as pointed out in the start of the tutorial in order to find the models):
$ roslaunch gazebo_sensors_tutorial camera_gazebo2.launch
$ rosrun gazebo_ros spawn_model -database aruco_cube -sdf -model aruco_cube  -x 0.2 -z 0.05
$ rosrun gazebo_ros spawn_model -database pawnB1 -sdf -model pawnB1 -x 0.1 -y -0.1 -z 0.02
Then run the following launch file that:
- Starts two ArUco nodes, tuned to detect each of the two markers by specifying:
- the marker ID,
- the marker size,
- the marker frame
- the reference frame
- A node that subscribes to the published marker poses and broadcasts a transform located at the center of the objects.
- Starts rviz to visualize the detected markers and all the transforms.
$ roslaunch gazebo_sensors_tutorial camera_aruco_cube_rviz-2.launch
>>> EXERCISE
   Move the pose of the cubes using the gazebo GUI and check how the new poses are tracked in rviz.
You can take a look at the files of the gazebo_sensors_tutorial package to check that:
- File launch/camera_gazebo2.launch runs gazebo and loads the camera2.world.
- File worlds/camera2.world contains the camera-plugin model.
- File models/camera-plugin/model.sdf contains the plugin libgazebo_ros_camera.so where the camera name, camera topics and frame are specified.
- File launch/camera_aruco_cube_rviz-2.launch runs the image_proc node, includes the launch files for the aruco nodes, and runs the arcuo_frames_detection.
- File launch/aruco_single.launch.xml runs the node single of the aruco_ros package with the values of the arguments passed (or given as default).
- File src/arcuo_frames_detection.cpp implements the node that subscribes to the poses of the aruco frames detected and publishes at the center of the cubes.
The RealSense camera
The Intel® RealSense™ Depth Camera D415 is a RGBD camera that generates the depth data with stereo vision technology that is optionally assisted by an infrared projector. The imaging system has the ability to synchronize with color stream. Detailed technical information can be found in the datasheet.
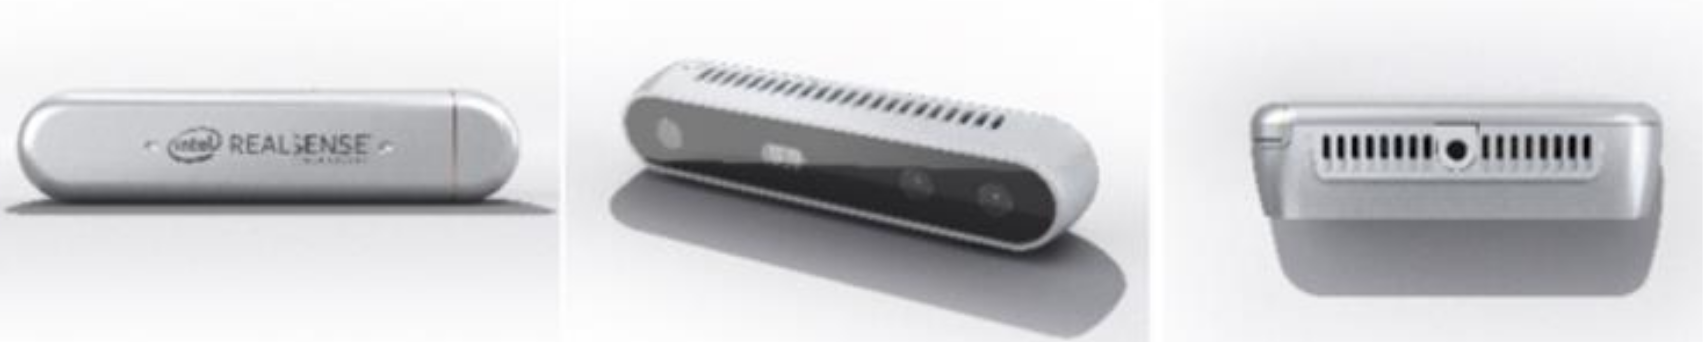
The realsense-ros package is an ROS Wrapper for the D400 series, the SR300 Camera and the T265 Tracking Module, i.e. this package will allow us to work with the D415 through ROS. For simulation purposes using Gazebo, the package includes an URDF file _d415.urdf.xacro that describes the D415 sensor with the plugins used.
In the package gazebo_sensors_tutorial this file has been modified by providing a xacro::macro that wraps the URDF model to make it configurable through parameters that allow to activate/deactivate the different cameras and to change the update rate. The modified file is robot/sensors/_d415.urdf.xacro.
>>> EXERCISE
   Take a look at the whole file robot/sensors/_d415.urdf.xacro that describes the D415 sensor and at the file robot/camera_left.urdf.xacro that uses it and describes one of the cameras to be used in the following example.
The chess demo
An example has been prepared with a D415 camera and a chessboard and two chess pieces labeled with ArUco makers. The world reference frame is located at the center of the chessboard.

Using Gazebo
The following launch file opens rviz and the Gazebo simulator:
$ roslaunch gazebo_sensors_tutorial camera_chessboard.launch
This launch file has an argument called recordimages which has a default value set to false. If you launch the file with the argument set to true, then the node record of the package rosbag will also be run to record during 12 s the raw images and the camera info. The resulting rosbag file is called myrosbag.bag and stored in the ~/.ros folder.
Using rosbag
In order to avoid the costly simulation of Gazebo, here we are going to use images previously recorded using the rosbag utility, which are stored in the rosbag folder.
First move the rosbag file to the ~/.ros directory and then launch the demo_aruco_rosbag.launch file that runs the rosbag node in playback mode and also opens rviz:
$ cp src/sensing/gazebo_sensors_tutorial/bags/myrosbag.bag ~/.ros
$ roslaunch gazebo_sensors_tutorial demo_aruco_rosbag.launch
EXERCISE 5
This exercise is devoted to run the complete system that detects a given object, computes the joint values to grasp the object and updates the robot and the object in rviz.
First, follow these steps:
- Launch the demo_service_camera.launch file from the ur3_demo_package to start the services offered by the ur3_demo_node and to visualize the system setup (including the camera), although:
- The image of the camera will not be shown because it is not yet published.
- The markers for the aruco tags will not be shown.
- Launch the demo_aruco_rosbag_no_rviz.launch file from the gazebo_sensors_tutorial package that:
- Advertises the image from the rosbag.
- Runs the aruco nodes to detect markers 100, 102, 201 and 301
- Does not run rviz.
Now the image and the markers should appear in rviz
- Run the grasp_broadcaster of the ris_solution package implemented in exercise 4 that listens to frame aruco_201 and broadcasts the grasp01 transform.
Now the grasp frame should appear in rviz
Then, implement a node called my_solution in package ris_solution such that:
- Listens to grasp01 transform w.r.t. the robot base, like the grasp_listener did in exercise 4.
- Calls the ik service to compute the joint values corresponding to the grasp01, like the democlients node implemented in exercise 3.
- Calls the setrobconf to move the robot to the computed joint values, like the democlients node implemented in exercise 3.
- Listens to pawn_201 transform w.r.t. the world, like the grasp_listener did in exercise 4..
- Calls the setobjpose to move the black pawn to the listened transform.